Monday, 23 April 2012

Raku Leaf Vase and Ammonite Vase

Here are a couple of Raku fired pieces that I made recently.

I used some leaves from my garden to make the leaf design on the front. It was made by wrapping a soft slab around a cylinder, then after removing the cylinder, I pushed the top together and pushed a dowel right through to make the hole. A base was added and impressed decoration once the piece was a little firmer.

To decorate, I brushed copper carbonate onto the bisque fired surface then washed back a little so that the copper carb remained in the textured areas. The whole pot was then sprayed with a 'White Crackle' and glazed and fired to 1000deg cent in my raku kiln.

Raku Fired  'Leaf Vase' with White Crackle glaze and Copper Carb detail


Here is another piece I call the 'Ammonite Vase'...


Raku Fired 'Ammonite Vase' with White Crackle and Amethyst Glaze


Waiting for some fine weather to fire some more pieces that I have ready....

Sunday, 15 April 2012

Mucking Around With 'Dry Glazing' Techniques - Cone 6

Dry Glazes and Engobes for Cone 6

This is obviously NOT to be used for functional pieces (for those that are new to ceramics), only sculptural pieces. Best when used over heavy texture, carving, sprigging etc and applying the engobe in varying thicknesses in combination with the dry glaze.
These recipes and techniques come from an Australian ceramic artist by the name of Simone Fraser. I have long admired Simone’s work. The recipes and techniques below were obtained whilst studying ceramics at Hornsby TAFE some years ago. Her website is well worth a visit to see some examples of how she still uses these engobes, dry glazes and techniques. http://www.simonefraser.com.au/

Step One - Apply Engobe to leatherhard clay over texture and bisque fire to Cone 06. You can cover the entire tile/piece or sponge back in places to reveal the clay body underneath, which gives you another variation (very nice).
I don't nearly have enough texture on these tiles for this to work effectively, but at least it's a guide. When heavier texture is used, it gives the ability to apply the engobe thickly and then remove some in the high areas giving better results.
Photo below is just to give you an idea of the colour of the engobe on its own after bisque firing. You can also add more oxide quantity to each engobe base than I have here. Additionally, you can make up other colours. Up to you. Test, test, test. The engobes don't look like much when initially fired to Cone 06 but at Cone 6 with dry glazes etc over the top, they work their magic.

Engobe Base Recipe
Eckalite                60
Silica                    20
Potash Feldspar  20
Bentonite              3

Step Two - After bisque firing the engobed tiles, I apply various oxides washes over engobes then sponge off/back in completely in areas to ensure that the underlying engobe is also visible.
NOTE: In all of the tiles shown here I have used a 'Rutile' wash (resulting in red) and a 'Manganese' wash (resulting in a metallic dark brown to black). You will notice that the wash is prominent in the deeper texture here but that is up to you. Also, other oxides work too. Again test.
When I was taught at college, we were only taught to use the engobe and dry glazes in combinations. I have found that adding the oxides wash just adds another dimension.
Step Three - I then sponge on the 'Dry Glazes' so that they appear on the very top surface. This allows the underlying engobe, oxide wash and clay surface to show through.
There are endless possibilities with this dry glazing technique. They can be sponged on, dipped, brushed on and then wiped back. I like sponging on or brushing using a stiff fan brush as it then just touches the surface as I am trying to keep the deeper texture free from glaze.
I have not covered all the variations as they are endless. I find that it works well to use contrasting engobes/oxides under the glaze to achieve the best results.

Here are 3 tiles and how I decorated each one. I see that I have alot of improving to do with this techniques, but trial and error is the key to success.  
Tile One
This tile has the following;
·         Engobe with 4% Chrome added to the base. Painted covering the entile tile.
·         Rutile wash on the left and Manganese wash on the right and sponged back lightly in places.
·         Cobalt Dry Glaze (Base with 2% Cobalt) sponged all over the very surface, making sure not to sponge in deeper textured areas.


Tile Two
This tile has the following;
·         Engobe with 1.5% Cobalt Carb added to the base. Painted covering the entile tile.
·         Rutile wash on the left and Manganese wash on the right and sponged back lightly in places.
·         Moss Green/Brown Dry Glaze (Base with 3.5% Yellow Iron Ox plus 3% Copper Carb) sponged all over the very surface, making sure not to sponge in deeper textured areas. Moss Green/Brown tends to be green where heavier and moss brown were lighter application is achieved.


Tile Three
This tile has the following;
·         Engobe with 8% Iron Ox added to the base. Painted covering the entile tile.
·         Rutile wash on the left and Manganese wash on the right and sponged back lightly in places.
·         Cobalt Dry Glaze (Base with 2% Cobalt) sponged all over the very surface, making sure not to sponge in deeper textured areas.


Dry Glaze Base Recipe
Eckalite 2                    23 (I think EPK would be a sub, as Eckalite is a Kaolin)
Soda Feldspar             16
Whiting (calc carb)     28
Molochite #200           23
Frit 4193                      8

Add; 2% Cobalt for Blue
         3.5% Yellow Iron Ox plus 3% Copper Carb for Moss Green / Brown
         6% Copper Carb for Apple Green (i did not have an example of that          
          variation above)


Tuesday, 3 April 2012

Reliable Cone 6 Glaze - Chrome Tin Red

Flower Sculpture Glazed in Chrome Tin Red at Cone 6

This flower sculpture was made some months ago now and intended to be used on a steel rod in the garden. However, it looks just a nice sitting on a table. I have glazed this piece using a Cone 6 glaze called Chrome Tin Red. Its one of the most reliable cone 6 glazes I have ever used and you can experiment as I have done, by over spraying with other glazes to see what happens. Here I have used 'Fake Blue Ash' and a glaze called 'Nutmeg'. I used a white earthenware paperclay from 'Blackwattle Pottery' located in Ingleburn NSW. John manufactures his own clays onsite and I have found them to be excellent. The white earthenware clay I buy from John are recommended to be fired to 1150 deg c from memory, but I find it fires to 1200c with no issues to date. I have also used his 'White Grog Raku' clay for my raku pieces.

Here is the recipe for 'Chrome Tin Red' Cone 6 Glaze' - sometimes known as 'Raspberry Red' or 'Burgundy Red'

 
Whiting                       21.00 grams
Gerstley Borate            8.00
Edgar Plastic Kaolin     9.00
Talc                              4.00
Custer Feldspar         31.00
Ferro Frit 3134             9.00
Silica                          18.00
Tin oxide                      5.00
Chrome oxide              0.2
Total                        105.20 grams 


Here is another Chrome Tin Red/Pink glaze that is also reliable.

'Chrome Tin Red/Pink' Cone 6 (Glossy)

Gerstley Borate            21.00 grams
Nepheline Syenite       16.00
Edgar Plastic Kaolin    11.00
Whiting                        20.00
Silica                           32.00
Tin oxide                     05.00
Chrome oxide                0.2
Total                         105.20 grams


No fussy around with the firing of this glaze and I have found that it fires well no matter what the firing schedule, but I would recommend a hold for 1/2 hr at around 900c on the way back down. I have even used this glaze in single firing with good results. Good luck and drop me a line to let me know what you think of this glaze.


Tuesday, 28 February 2012

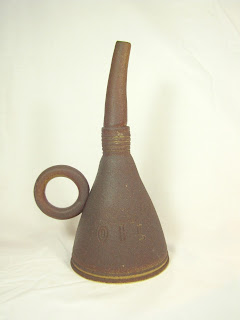
'Old Oil Cans'

I decided to make a series of 'Old Oil Cans' recently. I just finished glazing and firing them last week and pretty happy with the results. I put finishing them on hold to make more pieces for 'Articles Fine Arts Gallery' Exhibition to be held in March. I used a Cone 6 glaze called 'Floating Red' but instead of dipping the glaze, I sprayed a light coat which turned out better than expected and they look just like rusty oil cans. The finish is matt, dry and rough to touch. This glaze is usually a variegated iron red, yellow to black, semi gloss glaze. Yellow where thinner and black were thicker. I have two variations of this recipe in my book. I used the second one. As you can see from the recipe, it has few ingredients and like any other glaze, application is the key and by spraying this and perhaps a cooler top temp, I achieved a good result.

Recipe Name: Floating Red

Cone: 6 Color: multicolored w iron red
Firing: Oxidation Surface: Glossy
Amount Ingredient
                                                      Amounts I Used
55       Gerstley Borate—1999          48
15       Talc                                     13
30       Silica                                   26

Additives
15 Iron Oxide—Red                   13.0


Collection of Ceramic Oil Cans


Oil Can 1 with sprayed 'Floating Red' Cone 6 glaze

Oil Can 2

Oil Can 3

Oil Can 4

Oil Can 5

Oil Can 6

Sunday, 19 February 2012

Articles Fine Art Gallery - 32nd Anniversary Exhibition

I am very pleased to have been asked by Frances and John Vander of 'Articles Fine Arts Gallery' at Stanwell Park NSW to exhibit a series of my Raku fired pieces for their 32nd Anniversary Exhibition to be held on Saturday 3 March 2012.

I introduced myself to John at his gallery some weeks ago and explained what I do. He asked me to bring along some work to show him. Fortunately for me, he was pleased with my work and I am very proud to be apart of the show in March. Stanwell Park is only a half an hour drive from my home in Appin, so looking forward to a good business relationship with John and Frances in the future.

The series of work in the exhibition is called 'Sea Shells' and as you can tell by the name, the body of work is based on my love for nature and the sea. I love to wander along the beach and find little treasures as inspiration for my work.  The textures and colours of the rocks, sand, rockpools, seaweed and shells and I find beautiful and Raku firing my ceramics accentuates and compliments the pieces I make giving them a natural and earthy feel. 

Below are a some examples of my work that will be in the exhibition. There will be a number of well known  artists (unlike myself) featuring their work in March. If you have the opportunity, go along to see what is on offer. The program is also below for your information. There will be entertainment and refreshments. The coastal drive to Articles Gallery at Stanwell Park is very scenic and enjoyable. Don't hesitate to contact John or Frances on 02 4294 2491 for more information. Make a day of it.


Wednesday, 18 January 2012

Garden Flower Sculpture

Had a short break from pottery over the Christmas holidays but back in full swing again and working on a few different things. I have made a few pieces which I intend to Raku Fire in a short while. I have always loved plants and gardening. I particularty love Australian native plants and the diverse flowers and seed pods mother nature provides for our visual pleasure.  I have at differant times, made pots and sculptural pieces that are in some way a reflection of things like seed pods from nature. Working on another Banksia Seed sculptural piece at the moment which I plan to pit fire to reflect the way a bush fire might affect a tree in the bush. Other seed pods in mind too, so keep posted for more updates and photos. Plan to make a series and call it "Seed Pods from Nature'. Also, my love old oil cans has inspired me to make a series of 'Oil Can Relics'. Love the many different forms, spouts, handles which help create each personality. Just love how they look. As well as these, I am continuely looking at extending my Cone 6 glazes so have been mixing up a few more glazes to test, mostly for sculptural pieces. Looking at making some more funtional pieces too incorporating the wonderful textures available in my box of treasures that include handmade stamps, found objects from nature, old cogs, wheels and other man made objects and relics.

Here is the glazed result of one of the flower sculptures shown in an earlier post (unglazed). This particular piece was single fired and I am pretty happy with the result.


If you would like the recipe for the glaze used here, drop me an email and I would be happy to send it to you. 

Tuesday, 29 November 2011

Wedding Favours / Gifts

After making a run of Christmas Decorations recently (see my last post), I got thinking that these lovely little decorations would make beautiful Wedding Favours, Wedding Gifts or Bombonieres. During a short spell from pottery (no kiln etc), I remarried and I recall how much trouble I had to find a simple, yet personal and pretty gift to give our special friends and family to remember our day. I ended up buying little boxes, coloured paper, sugar coated almonds and made my own little boxes which although were nice, these would have been so much better. They would have looked so beautiful on the tables, placed on top of each plate/napkin and a lovely surprise and talking piece as our guests sat down at their places. They could be used to decorate in other ways too, so the possibilities are endless.

The templates for these shapes I make myself from an original drawing. I stamp each one with clay stamps that I have made myself, I use glazes that I have formulated myself, so each one of these little treasures is a little differant and very unique.

I am quite excited, as I have heaps of other ideas too, which means more glaze testing, drawing and playing with clay. More time out in the studio. How wonderful.


Butterfly Heart Wedding Favour

White Floral Wedding Favour

Raspberry Red Heart Wedding Favour


Various Birds & Peace Dove Wedding Favours