Showing posts with label raku. Show all posts

Sunday, 7 October 2012

RaKu MaNia

Pottery is a creative passion shared by many. It brings people together who are likeminded and equally passionate about the same thing. I recently had the pleasure of meeting a new friend brought about by a our shared love for clay and raku firing. Rhonda Morris lives about 30 - 40 mins from my home in Appin NSW and we met for the first time simply because we share an interest. We intially met via the American website 'Cone 6 & Other Ways With Clay' www.cone6pots.ning.com The founder of the website George Lewter was calling for potters around the world to host a raku firing day and invite potters to get together for this event. As it turned out, Rhonda and I are were the only two in the world that ended up getting together for a raku firing day. Rhonda and I had a lovely afternoon. We chatted, glazed pots then as the sun went down we set up for the firing. Despite a very windy evening, our raku firing was fun and a success. It is definately something that I would love to do again. Here are some pics of our firing.


Waiting for the Raku Kiln to reach temperature. This is a kiln i made myself. Details in earlier post on this blog.

What a beautiful sight to behold. Nothing beats opening the kiln and taking out red hot pots.


I was taking pots out of the kiln and Rhonda was adding additional reduction material and putting on lids

Fast and exciting!

Don't fall in the pool Rhonda!


Rhonda's pots straight out of the redction bins, prior to being cleaned

View of my pots in the reduction bin


My pots after alot of scrubbing!
 The next night and the following week, I did other firings on my own. Talk about hectic! I dropped one pot in the rush of getting them all out before they got too cool. Here are the results of some of those pots.


'Under the Sea Sculptural Pots' - Raku Fired


Detail of reduction on one of the 'Barnicles pot'

Detail of light reduction - Copper red in cracks

Japanese style Ikebana Vase - White Crackle, Raku Fired

Tea Light Candle Holders, Raku Fired - Copper Matt glaze with some nice reduction

Set of 3 Square Raku Fired White Crackle -  Art Deco Style Vases

Large Open Plate - Raku Fired White Crackle with Copper Wash highlights

Detail of Underside of Raku Fired Plate

Thanks to Rhonda Morris for a great day and for letting me know about the 'Mud Colony' via facebook www.mudcolony.blogspot.com

Monday, 23 April 2012

Raku Leaf Vase and Ammonite Vase

Here are a couple of Raku fired pieces that I made recently.

I used some leaves from my garden to make the leaf design on the front. It was made by wrapping a soft slab around a cylinder, then after removing the cylinder, I pushed the top together and pushed a dowel right through to make the hole. A base was added and impressed decoration once the piece was a little firmer.

To decorate, I brushed copper carbonate onto the bisque fired surface then washed back a little so that the copper carb remained in the textured areas. The whole pot was then sprayed with a 'White Crackle' and glazed and fired to 1000deg cent in my raku kiln.

Raku Fired  'Leaf Vase' with White Crackle glaze and Copper Carb detail


Here is another piece I call the 'Ammonite Vase'...


Raku Fired 'Ammonite Vase' with White Crackle and Amethyst Glaze


Waiting for some fine weather to fire some more pieces that I have ready....

Sunday, 19 February 2012

Articles Fine Art Gallery - 32nd Anniversary Exhibition

I am very pleased to have been asked by Frances and John Vander of 'Articles Fine Arts Gallery' at Stanwell Park NSW to exhibit a series of my Raku fired pieces for their 32nd Anniversary Exhibition to be held on Saturday 3 March 2012.

I introduced myself to John at his gallery some weeks ago and explained what I do. He asked me to bring along some work to show him. Fortunately for me, he was pleased with my work and I am very proud to be apart of the show in March. Stanwell Park is only a half an hour drive from my home in Appin, so looking forward to a good business relationship with John and Frances in the future.

The series of work in the exhibition is called 'Sea Shells' and as you can tell by the name, the body of work is based on my love for nature and the sea. I love to wander along the beach and find little treasures as inspiration for my work.  The textures and colours of the rocks, sand, rockpools, seaweed and shells and I find beautiful and Raku firing my ceramics accentuates and compliments the pieces I make giving them a natural and earthy feel. 

Below are a some examples of my work that will be in the exhibition. There will be a number of well known  artists (unlike myself) featuring their work in March. If you have the opportunity, go along to see what is on offer. The program is also below for your information. There will be entertainment and refreshments. The coastal drive to Articles Gallery at Stanwell Park is very scenic and enjoyable. Don't hesitate to contact John or Frances on 02 4294 2491 for more information. Make a day of it.


Wednesday, 18 January 2012

Garden Flower Sculpture

Had a short break from pottery over the Christmas holidays but back in full swing again and working on a few different things. I have made a few pieces which I intend to Raku Fire in a short while. I have always loved plants and gardening. I particularty love Australian native plants and the diverse flowers and seed pods mother nature provides for our visual pleasure.  I have at differant times, made pots and sculptural pieces that are in some way a reflection of things like seed pods from nature. Working on another Banksia Seed sculptural piece at the moment which I plan to pit fire to reflect the way a bush fire might affect a tree in the bush. Other seed pods in mind too, so keep posted for more updates and photos. Plan to make a series and call it "Seed Pods from Nature'. Also, my love old oil cans has inspired me to make a series of 'Oil Can Relics'. Love the many different forms, spouts, handles which help create each personality. Just love how they look. As well as these, I am continuely looking at extending my Cone 6 glazes so have been mixing up a few more glazes to test, mostly for sculptural pieces. Looking at making some more funtional pieces too incorporating the wonderful textures available in my box of treasures that include handmade stamps, found objects from nature, old cogs, wheels and other man made objects and relics.

Here is the glazed result of one of the flower sculptures shown in an earlier post (unglazed). This particular piece was single fired and I am pretty happy with the result.


If you would like the recipe for the glaze used here, drop me an email and I would be happy to send it to you. 

Thursday, 15 September 2011

'Tree of Life' Candleholder

I have not posted in a while as my husband and I have been putting alot of our spare time into building a new pottery studio in our garden. I have been doing my pottery in our garage but we desperately need our garage back for other things. I am very excited as it's nearly finished. Just have to add internal shelving and benches and a few cosmetic things to finish on the outside. Stay tuned, as I will post photos of the completed studio within the next week.

Here is a piece that I made recently. I love nature, so this is often reflected in my work. It was bisque fired then Raku fired. I used a white crackle glaze for the main glaze and a copper matt glaze was used for the leaves. For additional highlights I also used a red enamel paint for the centre of the flowers. This piece was made from a slab of clay folded around a pvc cylinder then I added additional elements from there. I enjoy making sculptural pieces but since I like to sell my work at markets, there is more demand for pieces that are also funtional. I plan to make others like this and want to experiment with making some that will hold more than two candles and that can accomodate tea light candles in some way. This piece will be for sale at next Picton Creative Traders Market on Sunday 2 October. Come along and have a look at his and other new work for sale.


Monday, 25 July 2011

Successful Raku Firing Weekend

I have been wanting to do a Raku firing for some weeks but just did not get a chance due to the awful, rainy weather we have been having or to other commitments. This weekend, I finally had the opportunity to do two. On Saturday as it was still raining, I decided to use my little electric kiln to fire several tall sculptural pieces and some pendants. I used sawdust alone as my reduction material this time as I wanted to try to achieve the best possible reduction on the feature 'copper matt' area on the pieces. I did get a better reduction, but this also meant that the 'white crackle' glaze did not turn out as white as I like, but saying that, I am very happy with the results. I am still trying to perfect the timing thing with 'copper matt' and I must say it is a challenge. Each time I try, I seem to learn a little more. Sunday's work I am yet to photograph, but I was pretty happy with the results of that which I fired in my ceramic fibre/wire outdoor kiln.  Planning to make some more of these sculptural pieces to take to local craft markets to sell once our weather gets a little better.


Raku Sculpture - White Crackle & Copper Matt Glaze


Raku Sculpture - White Crackle and Ancient Amethyst Glaze

Raku Sculpture - White Crackle & Copper Matt Glaze

Raku Sculpture - White Crackle & Copper Matt Glaze


 Detail of Raku Sculpture - White Crackle & Copper Matt Glaze

Detail of Raku Sculpture - White Crackle,  Copper Matt & Amethyst Glaze

Monday, 20 June 2011

The Joy of Raku - My New Kiln


It was a cold and breezy Saturday night when I did the first firing in my newly built 'Raku Kiln' (posted details in my last blog). I was anxious to start the kiln to see how it would fire and to see the finished pots. The whole process of raku firing is dangerous, exciting, fast and almost ritualistic. There is  that connection and excitement firstly as I have been a part of the whole process of making the pots. With raku firing though, I am able to see the transformation inside the kiln as they change from cold to glowing red hot. Then taking the red hot pots (1000 deg c) from the kiln and placing them into the reduction bins to ignite into flames. At the end of this process, cleaning  off the carbon to reveal the hidden treasures is like a type of metamorphosis. Sometimes exhilerating and at times disappointing. The joy of Raku.  

There is an explanation of 'Raku Firing' in my last post.
All ready to go

Glazed pots in the kiln


I had set everything up earlier in the day so that we were ready to fire that night. I personally like to raku fire at night as it is much easier to see the temperature of the kiln by the colour inside and the shine of the glaze on the pots, which tells me they are ready to be removed. Five large metal tins and eight smaller ones, gloves, tongs, garden hose and a bucket of water nearby. I used newspaper as my reduction material inside the tins and all tins had lids. As the kiln was set up and packed earlier in the day, all there was to do was turn on the kiln and away we went. My three willing helpers, two daughter's Sarah and Alison and my husband Glen, volunteered to brave the cold night to participate and I could not have done it without their help. I packed the kiln using three small kiln shelves which were elevated on props so that the burner flame could pass underneath, hit a broken kiln shelf at the other end, then directed the flame up and over the arch.


         View of the burner path and pots through the chimney early in the firing

I started the kiln at about 6.40pm and turned off the burner at 8.10pm, so an hour and a half from start to finish. I could have probably left it on for a little longer, but my impatience got the better of me. I was generally very pleased with how the kiln fired and my only observation was that it fired a little cooler at the end where the burner was which can be tweaked by adjusting a few things.

The glazes I used on the pots for this fiing were; white crackle, turquoise and copper matt. Results were varied, depending on how much reduction I got in the bins, but overall I am quite happy with the results and I have learned a little bit more for the next time around. The no fail white crackle I really like. I particularly love the turquoise glaze which crazed beautifully on the inside of the trinket boxes and I even got some lovely copper red flashing too, so that was a nice extra surprise. Can't wait to do my next raku firing...


Note: To see a larger image of the photos on this page, hover over the image and click with your mouse.
  
                                                           
                                Pots straight out of reduction bins on left and after cleaning on right  


My daughter Sarah waiting patiently in the cold for the pots to be removed. She can be seen on the top right hand side of this page as the 'teacher with her sister, the student'. That photo was taken about 13 yrs ago.


I will post close up photos of some of the pots fired above in the days to come.

Thanks for taking the time to read my blog today.
If you would like to comment or share your raku experience with me, please comment below.


Sunday, 5 June 2011

Welcome to my Blog


My initial interest in pottery/ceramics started in high school. Later in life, I set up a small home studio and bought a pottery wheel.  I completed courses at technical college which was a great experience and I learnt alot. The areas  I have explored over the years include; Raku, Woodfiring, Sawdust and Pit Firing. I make both sculptural and functional pieces. The differant surfaces, textures and objects from nature attract me such as lichen, rocks, feathers and shells.  I like to collect things from nature as well as made objects that make permanent marks on the clay surface. Making and using handmade sprigs and stamps from clay and plaster is another way to leave marks on clay too. Most recently, my interest has been focused on researching Cone 6 glazes and I have made quite a few glazes that I am nearly ready to test. The results of which I will post on this page. I am happy to share recipes and ideas with anyone who is interested, which is the whole idea of my blog.

Thanks for taking the time to have a look today.


Australian Banksia - Handbuillt in white raku clay, then applied red clay terrasig that i found locally. Pit fired in sawdust, seaweed, salt, copper carb, copper sulphate, banana skins.


Handbuilt in white raku. Oxides and underglazes applied prior to bisque. Dry glaze applied then fired to Cone 6.


Handbuilt then painted with acrylics.


Thrown in white earthenware. Terrasig applied then burnished and bisque fired.
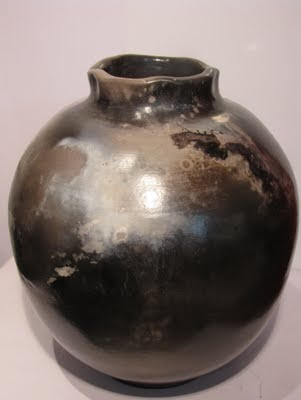
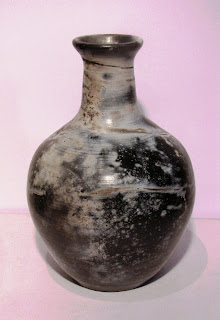
Raku fired, horse hair and sugar placed on pots after being taken straight from the kiln.


Handbuilt in white raku then terrasig applied and burnished. Pit fired.


Thrown in white earthenware. Terrasig applied, burnished and bisqued. Raku fired then bird feather and sugar placed on pots straight after being taken from the kiln.


Thrown in white earthenware, terrasig applied and burnished. Pot on the left wrapped in copper wire, both pit fired with combustibles such a sawdust, seaweed, copper carb, dried banana skins and salt for added surface decoration effects.


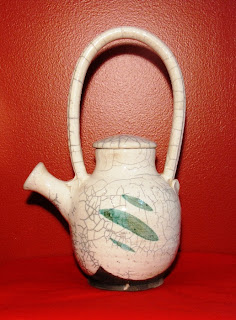
Both thrown in white raku. Raku fired, white crackle glaze with copper carbonate brushed over glaze.